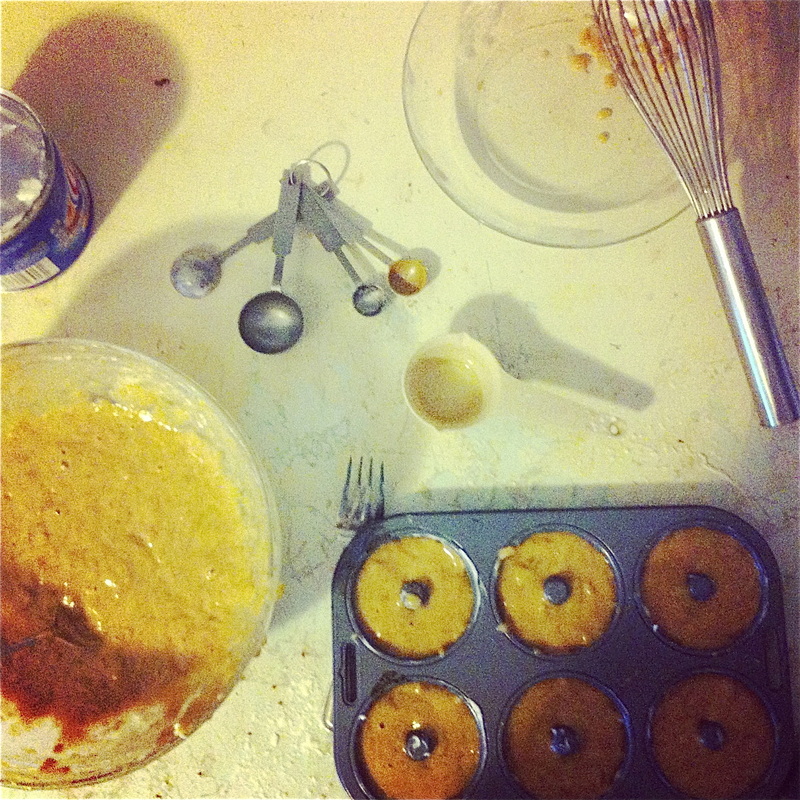
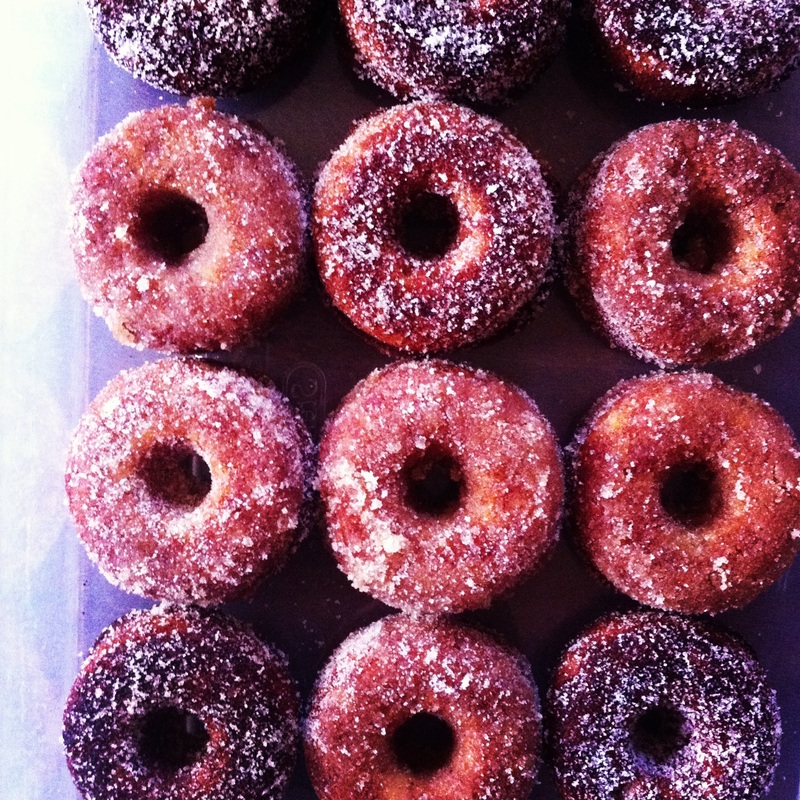
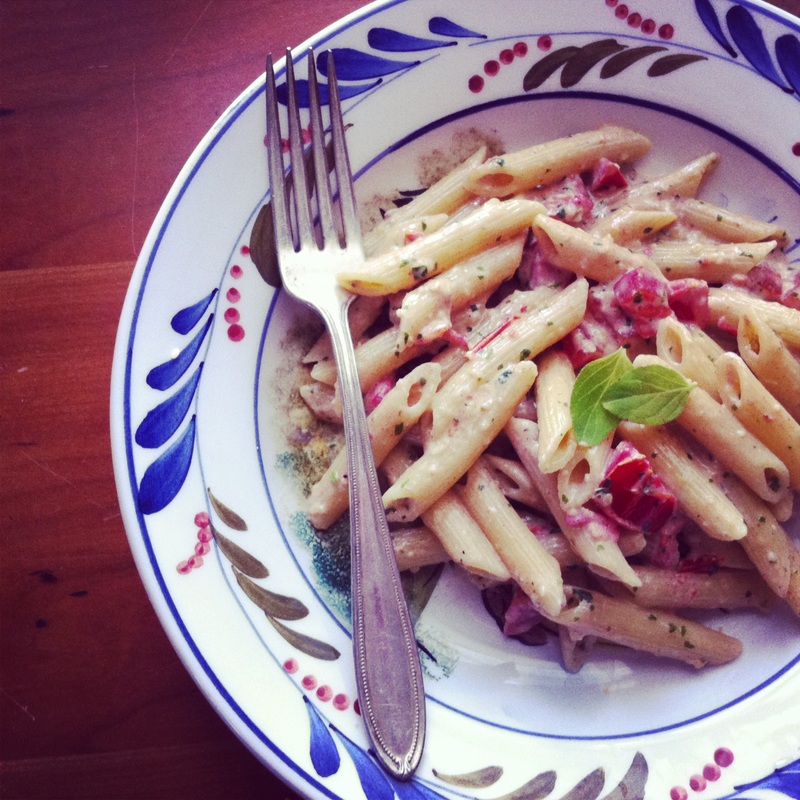
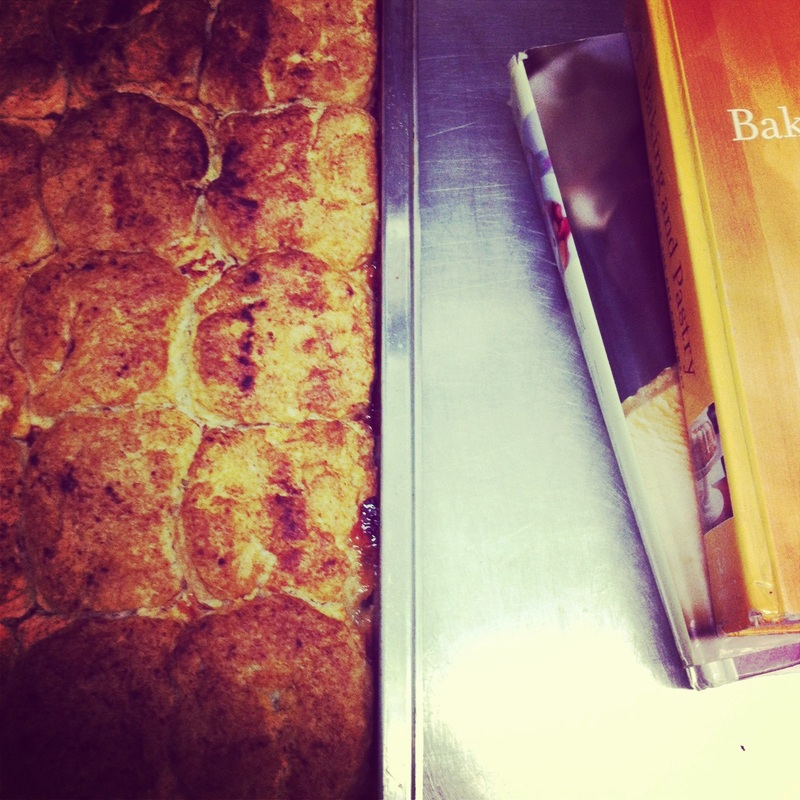
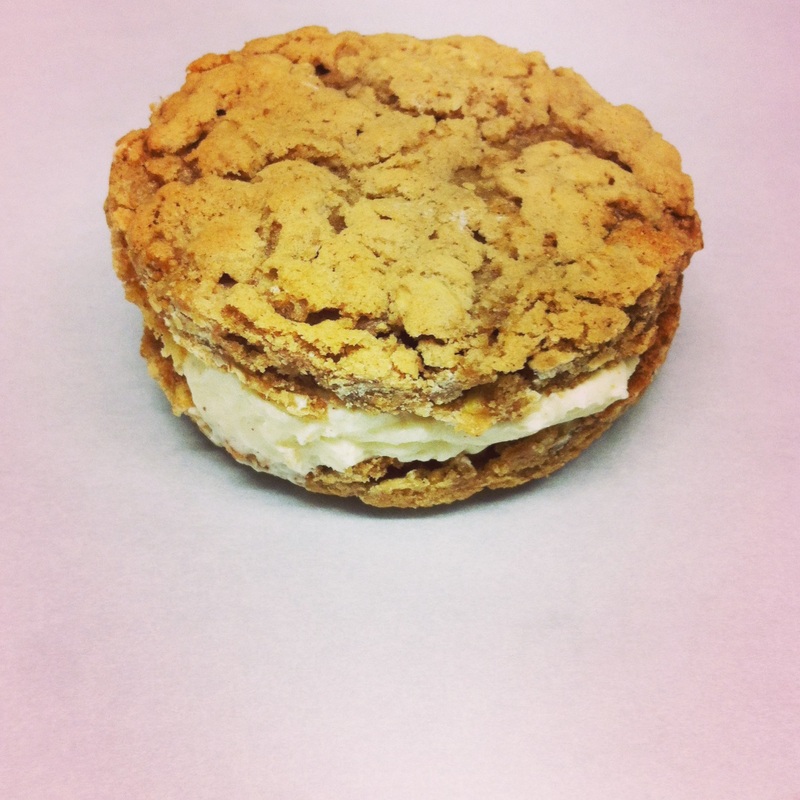
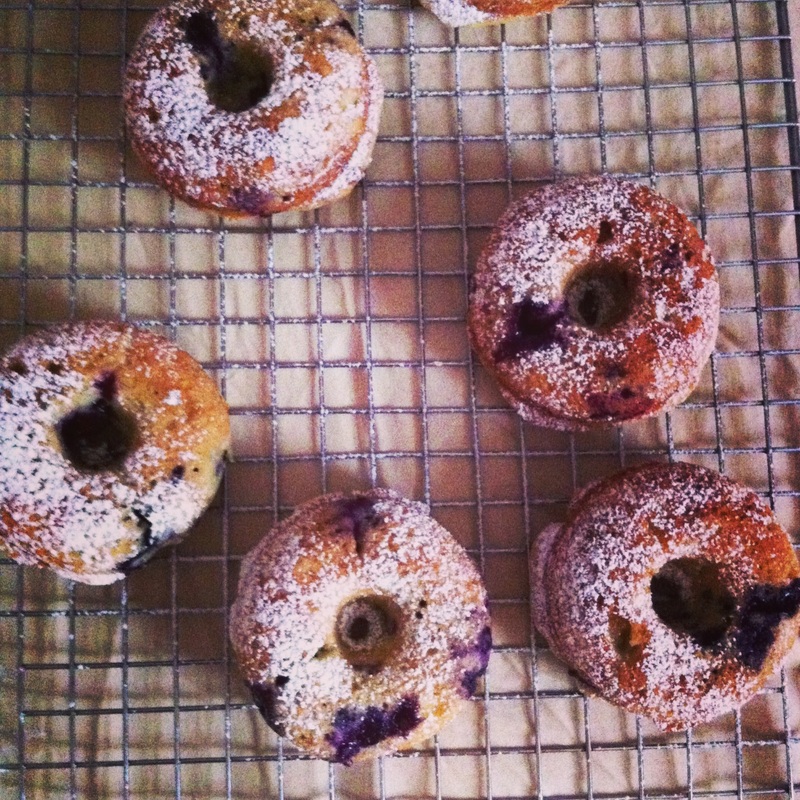
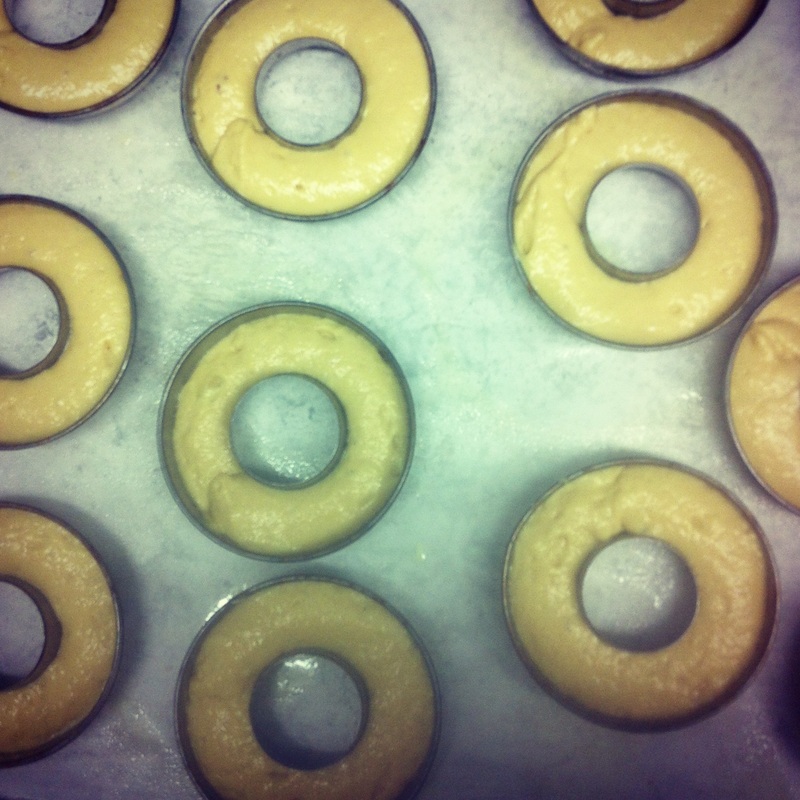
The countdown has officially begun. Jam and I will be soarin' high in a little over a month. Asia bound. Recently I've spent a great deal of time thinking of the adventures that await us. Amidst all the excitement I have had little time to reflect on this past year. A year that seemed a bit hectic, unsettling at times, but nonetheless, fulfilling. Up until this year, I was happy living this nomadic lifestyle. Beyond the house I grew up in, I didn't ever connect my idea of "home" with a specific place or house, I didn't become attached to places I lived, I was a bit of a squatter. I was never in one spot long enough to feel that physical attachment. It was the friendships I made along the way that drew me in, and continue to draw me back. I am endlessly excited to roam South East Asia with my best friend, to experience a world so different than our own, to fill our bellies with food that is foreign to us, to just enjoy being young. With that said, I am just as excited for all that awaits us when we return. That feeling of being content with the past, present, and future is possibly something I have been seeking this past year. Living each experience, being fully present, and allowing each adventure to be its own. That was a bit serious. Moving on to less "heavy" material. I've been keeping a "to-do" list. Instead of becoming shorter, it has grown and it continues to grow. I have multiple sticky notes, stuffed into the pockets of sweaters and jeans. With the trip nearing, I really should get serious, but there always seems to be something I'd rather be doing. Like cook, or bake. And cooking and/or baking is always so productive, so I don't feel too bad about neglecting all those lists. So I pass up mundane activities for cooking and baking, meh, it's no big deal. But what's slightly amusing is the fact that on all of these lists, there is at least two bullet points that read similar to these "find key-lime pie recipe," "make donuts for peeps at work." I think I slip those in to make myself feel better. I may not have dealt with my snow tires, or figured out my taxes, but you can be damn sure I found a key-lime pie recipe. Priorities people. On to donut making. I made donuts this week, banana donuts. I'm a big fan of baked donuts. A lot less work for a treat that is equally delicious. And I had brown bananas that have been sitting in my freezer for weeks now. Banana Donuts Recipe coutresey of Tracy over at Shutterbean.com - 1 1/4 cups flour
- 2 teaspoons baking powder
- 1/2 teaspoon salt
- 1 1/2 teaspoons ground cinnamon
- 3/4 cup granulated sugar
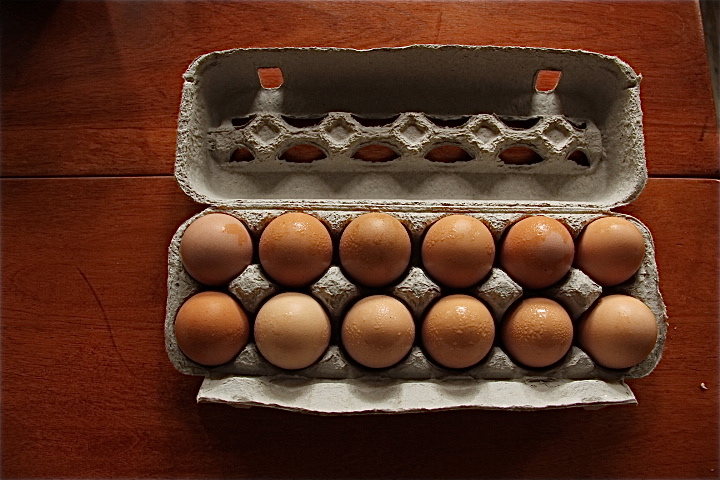
- 2 eggs, at room temperature
- 1 1/4 cups mashed ripe bananas (3 bananas)
- 2 teaspoons pure vanilla extract
- 1/2 cup vegetable oil
Preheat the oven to 350°. Grease 2 nonstick, 6-count doughnut pans. In a large bowl, whisk together the flour, baking powder, salt and cinnamon. In a small bowl, whisk together the granulated sugar, eggs, mashed bananas, vanilla and the oil. Stir the wet ingredients into the dry until just combined. Spoon the batter about three-quarters full into the prepared pans. Bake until golden and a toothpick inserted comes out dry, 12 to 15 minutes; let cool completely on a rack. I like to toss a few tablespoons of sugar with a teaspoon of cinnamon and then dunk them in it, fully coating them. Thank you for reading. oxo.
I have become far too blog lazy. Free moments have become few and far between. But here I am, it's 7:20 am, a time when only sitting in bed and pinterest cruising is allowed, unless of course, I have to work. As of late, I have been busting out pastries and the like at the Inn during the wee hours, and then hostessing in the evenings at a local restaurant. It has been nuts, my brain feels like mush by the time 11pm hits, but for some odd reason, I find enjoyment in all of it. I love my job at the Inn, I love whipping up sweets, but I'm generally holed up in a kitchen all day. My hostessing position allows me to meet new people, gab.. actual interactions with human beings!
The above was written weeks ago, or maybe even a whole month ago. ugh. I enjoyed the craziness of working two jobs at first, always having to be somewhere, commitments, an established routine. I should have realized it would eventually lead to a serious lack of sleep. Which then leads to a very grouchy and irritable Shiel who neglects such things as her blog. Well, lets just say I took a brief vacation. And now, I am back!
I am now working just one job. Just a five minute walk from my apartment, it's perfect. And I have three days off a week! Which means I have an excessive amount of time to cook and bake. These past few weeks I feel as though that's all I ever do, if I'm not prepping for dinner, or baking bread, I am most likely researching recipes or grocery shopping. While other ladies my age are out buying clothes and the like, I am buying pounds of butter, flour, and sugar.
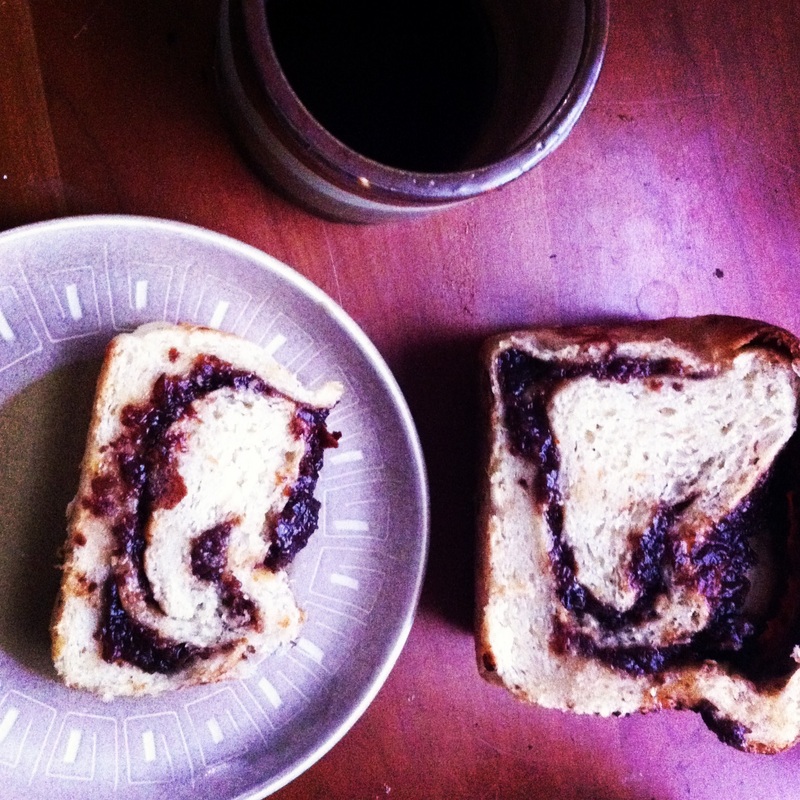
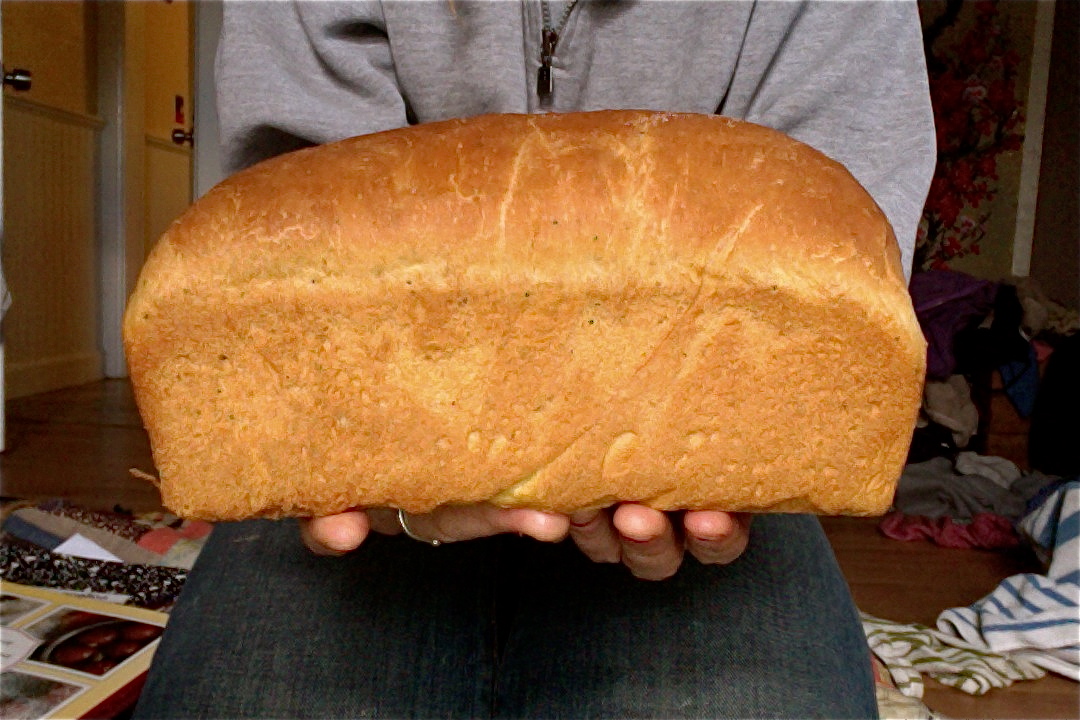
Winter is settling in here. I find myself staying in bed longer in the mornings to avoid the cold, drinking more coffee for its warmth, and committing to a whole month of bikram yoga for its 105 degree heat that I crave during the chilly months. I hate saying it, I really do, but I hate the winters in Vermont. I was born and raised here, I should at least be somewhat accepting of them. But as each year passes, I have come to dislike them more and more. I cringe when I have to go outside, literally. But it's okay, because in reality, I can fill my kitchen with warmth and the smell of fresh bread, and, well, everyone loves fresh bread.
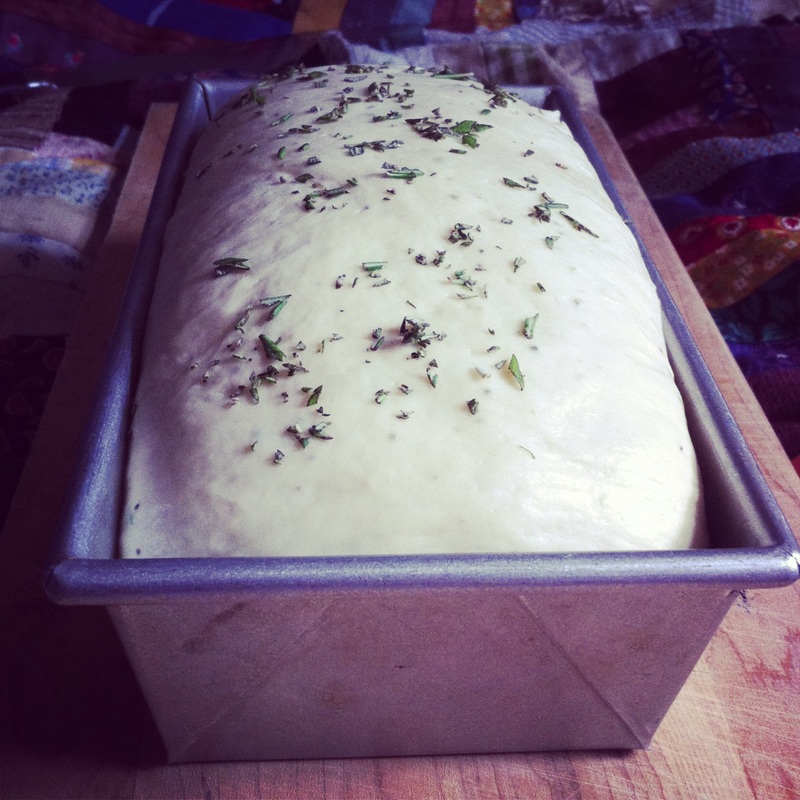
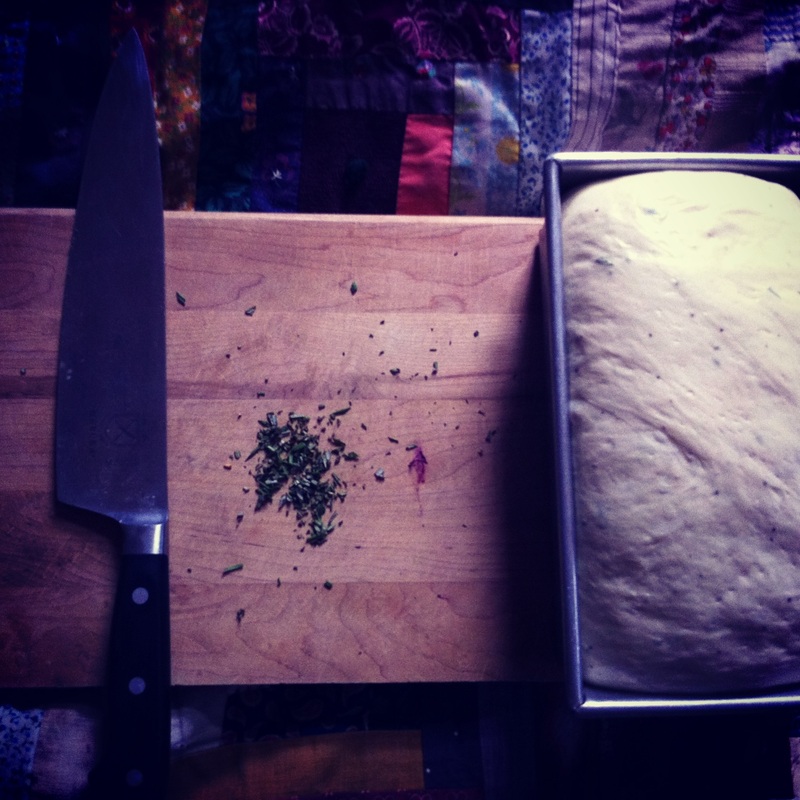
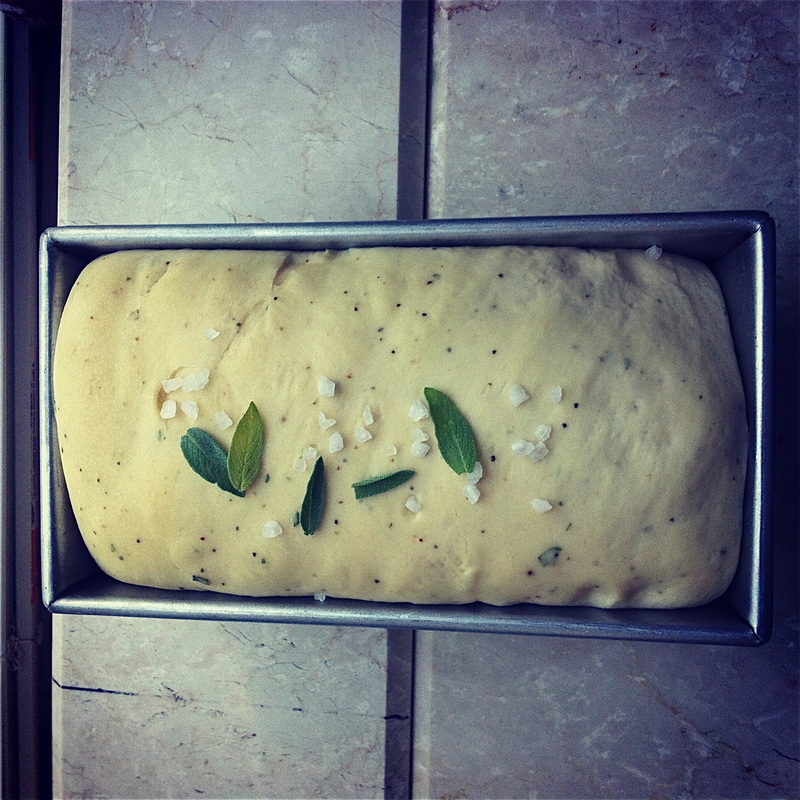
I recently found a wonderful recipe for your typical sandwich loaf. I toss some herbs in, and shit, it's tasty. A slab of bread is really a vessel for anything and everything. So today, I share with you this recipe. Go make bread, warm up your kitchen, especially if you're like me and refuse to believe winter is back already.
Rosemary (or any herb/spice) Sandwich Bread
Yields 1 loaf
2 teaspoons active dry yeast
1 cup (235 ml) warm milk
1/3 cup (80 ml) warm water
2 tablespoons freshly chopped rosemary (or 2 teaspoons dried rosemary, chopped)
1/2 teaspoon freshly ground black pepper
1 1/2 teaspoons salt
1/4 cup (60 ml) olive oil
3 1/2 cups (445 grams) bread flour
In a large mixing bowl (or bowl of a stand mixer), sprinkle the yeast over the barely warm milk and water and allow to sit about 5-10 minutes until activated (looks frothy). Mix in the olive oil, rosemary, black pepper, and salt. Gradually add bread flour, mixing until the dough comes together. If the dough is too dry and will not come together, add small amounts of water until it does. Conversely, if the dough is too sticky, add flour until it becomes workable; however, do not add too much flour or the bread will become dense.
Turn out dough on a lightly floured surface and knead the dough for 7-10 minutes, or until elastic. Alternatively, using the dough hook on a stand mixer, knead the dough for 7-10 minutes, or until elastic. Cover dough with plastic wrap or a kitchen towel and let rise until doubled in a warm place, about 1 1/2 to 2 hours. Punch down the dough before turning out onto a lightly floured surface. Shape the dough into an even log and place in a lightly greased 9 x 5-inch loaf pan. Press dough down so it reaches the corners evenly. Cover with a kitchen towel and let rise for another 40-60 minutes until doubled.
Preheat oven to 350 degrees F (180 degrees C).
Sprinkle the top of the bread dough with salt, pepper, and rosemary, if desired. Bake for 40-50 minutes, or until bread is golden and sounds hollow when tapped. Remove from baking pan and allow to cool slightly before slicing and serving.
Last week was a bit crazy, emotionally, more so than anything. I wasn't prepared for the shit storm that was about to unfold, i.e. I went to the dentist and found out my years of eating bags of Swedish Fish had finally come back to bite me in the tush. It played out like this; Tuesday morning, I'm at work, swamped with caterings and the like, reeling from turning 25. A bit dramatic, I know, but I tend to be a bit dramatic in such situations. One day into my 25th year, my youth long gone, middle age setting in... over-the-top, yes yes yes, I know, but this is exactly how I was feeling at the time. Those feelings have subsided drastically since then, so don't fret. I have not fallen into a hole of self-pity. So, I'm at work, tired, and a bit disheveled. I notice a tooth in the way back of my mouth is achey, sensitive to cold and sweet things, ugh, a sure sign I have a cavity. Now, generally, if I had been 24 or younger, I proabably would have ignored this dang tooth. I've always lived with this carefree attitude, shit will take care of itself. I admit, this hasn't been the best motto, or the most successful, more of an excuse to ignore the sometimes painfully obvious facts. But I'm 25, so this story is about to go in a whole new direction, the direction in which the mature, responsible adult seeks medical attention to deal with the problem at hand to avoid further complications. I somehow am able to lock down an appointment at the local clinic in Burlington. I leave work in a frenzy, scared to find out what the dentist has to say. After waiting 45 minutes, I finally am brought back. The next 30 minutes is spent taking x-rays of my mouth. I forgot how uncomfortable it all is, weird dental instruments being jammed in your mouth, the dental hygienist trying to ask you a bunch of trivial questions about your life that you don't care to answer, in this case only making the situtation worse as all of her probing questions reminded me of my recent birthday. I was probably a bit rude, maybe just short with her, as she quickly turned all of her attention to the work at hand. I'm truly sorry Miss Hygienist, I usually am quite a pleasant person to be around. The dentist comes in a little while later to take a peek at my x-rays. A fit man, probably in his 60's, white hair spilling out from under his hat. As he is looking at my teeth and my x-rays, he's hemming and hawing. Sounds that are increasinly worriesome. He finally delivers the awful awful news, "it looks as though you are going to need a root canal."
Happy friggin birthday.
... Not until hours later, and a wonderfully supportive fella and mom, was I able to calm down a bit. Step away from all of the sludge that had been piling up, and just let it be. I am continusly learning how to roll with the unexpected, how to not sweat the small things, and how to become more aware and responsible of my life and all that it entails.
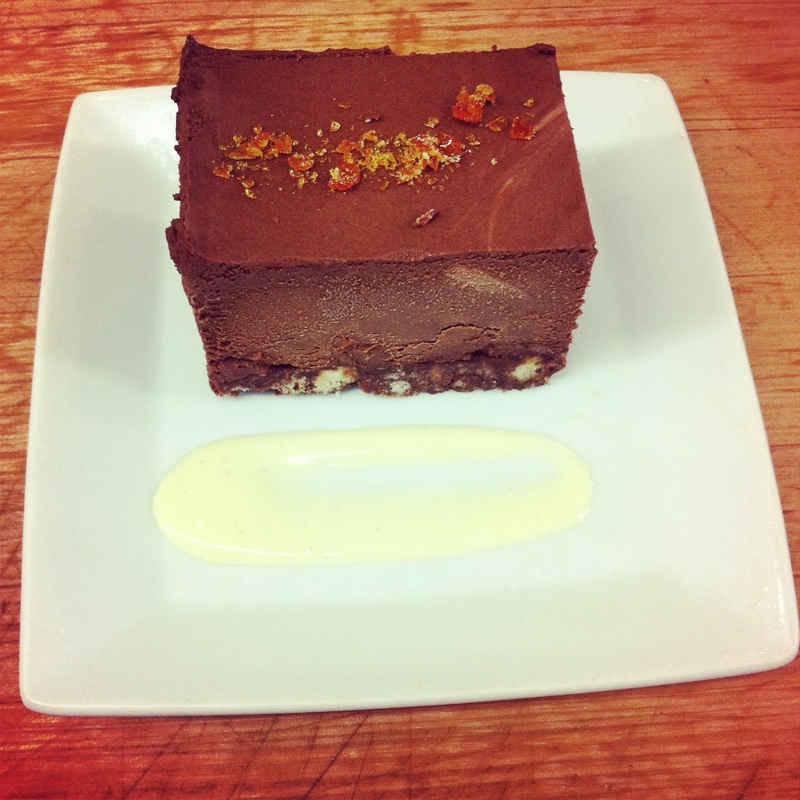
When I have days like those, days when I feel a bit defeated, I try to balance them out by switching gears, and instead focusing my energy on creative projects. This could be writing a lovely letter to my one and only best bud Annie, or researching menu ideas for the Inn, or just day dreaming. It brings me back to a positive state of mind. Which leads me to... Chocolate Peanut Gianduja. I wanted a project, something that would get me out of the funk I was in, and obviously it had to involve some sort of cooking or baking. I had stumbled upon the recipe for the Gianduja awhile ago, scribbled it down, and like so many other recipies, filed it away and forgot about it. Finding it hidden amongst all my papers this week was a nice surprise, it is a stunning dessert and a perfect addition to the menu at the Inn.
So, lets begin. Gianduja traditionally is made with hazelnuts, but peanuts work really well in this recipe. The base of the dessert adds a nice crunch to the smooth mousse-like upper layer.
Chocolate Peanut Gianduja
Crunchy Layer
2 1/2 oz milk chocolate
1/4 cup + 2 tablespoons creamy peanut butter at room temperature
1 1/2 cups finely crushed, thinly rolled butter cookies, such as Pirouette or Pirouluxe
Creamy Layer
10 oz milk chocolate coarsely chopped
1/2 cup creamy peanut butter, at room temperature
3/4 cup whole milk
1/4 teaspoon salt
1 cup heavy cream
cocoa powder or chopped peanuts for garnish
1. Cut a 9 by 21-inch piece of parchment paper and line a 9 by 13 by 1-inch inch or 9 by 13 by 2-inch baking pan with the parchment, allowing it to extend evenly over the two short ends.
Crunchy Layer
1. Combine the chocolate and peanut butter in the top of a double broiler set over gently simmering water, and stir occasionally until the chocolate has melted and the mixture is smooth. Remove from the heat and stir in the cookies, coating all the pieces with the chocolate mixture. Spread evenly in the bottom of the prepared pan. Set aside.
Creamy Layer
1. Place the chocolate in the bowl of a stand mixer and set it over a pot of gently simmering water. Stir occasionally until the chocolate has melted and is smooth. Remove from the heat and add the peanut butter. Fit the mixer with the whisk attachment, set the bowl on the mixer, and whisk to combine.
2. In a small saucepan, bring the milk and salt to a boil. Add half of the milk into the peanut butter mixture, and whisk until incorporated, then whisk in the remaining milk. Increase the speed to high and whip for five minutes, or until the mixture is creamy and cooled to room temperature.
3. In a clean bowl, whip the cream just until soft mounds form; do not over whip. Fold the cream into the peanut butter mixture. Spread it over the crunchy layer in the pan. Cover the pan and freeze until set, at least 4 hours.
4. To serve, run a knife alone the long sides of the dessert and it it out of the pan using the parchment "handles." Cut into slices or other desired shapes. Dust with cocoa or sprinkle with chopped peanuts, place on serving plates, and let sit at room temperature for about 10 minutes to soften slightly.
Thank you all for reading! oxox
I am 25 years old today. Eeek. Every birthday leading up to this one seemed a bit more relaxed, less stress-inducing. But for some reason, in my mind, 25 is the turning point. The point at which you go from being a carefree/wild/roaming individual to the adult with a (somewhat) clear view of your future endeavors. But then again, I probably have said that about every birthday past 20. All the same though, birthdays will always remind me of being young. The feeling similar to the excitement on Christmas morning. Jamie and I, since getting together, have always made birthdays really special and fun. I realize that's a really "cutsie" thing to say, but it's the dang truth. We always extend the celebration, it generally lasts 5 days or so; between parties with friends, to delicious outings spent feasting on tasty foods.
So here I am, 25 years old. If nothing else, this change of age has got me contemplating life and my goals, or possibly putting in just a little extra effort in accomplishing them, which is only a good thing. I'm the biggest procrastinator, a trait I really ought to do away with. It's a bit disabling in that I find I take far too many tasks on and then become somewhat overwhelmed with them all. In the most recent years, I look at my birthday as a fresh start, sorta like a second go at my New Years resolutions, or maybe just checking in with those resolutions I made months ago, and possibly have forgotten about. So here it is, I make one goal, a goal with a fluid time line, but a time line none the less. I dedicate time and energy, honest time and energy, no puttering, or not too much puttering. I commit to writing down the trials and tribulations of it all. Okay, that felt good to put out there.
This is still a cooking blog, right? It is! Which leads me to, lemon bars. Lemon bars are just so dang good, and vibrant, and pretty. Growing up, I remember making lemon bars, the lemon filling was so thin, too thin for my liking. Think of the filling as you would a curd cause it is a curd, tart but oh so sweet. I encourage you readers to experiment with the lemon part of these bars, try other juices like lime or maybe even yuzu! Yuzu? What is yuzu you ask? I was first introduced to this fruit when I worked at Milk Bar. It's a citrus fruit that originated in East Asia. It tastes somewhat like a grapefruit, think tart! Okay, back to lemon bars. I love a somewhat thin shortbread to accompany a nice thick layer of lemon. Enjoy these babies, great with a cup of tea, pretty when put on a fancy plate and shared with friends.
Thank you all for reading! ox.
Shortbread
228 grams unsalted butter
75 grams granulated sugar
2 T confectioners' sugar
1 egg yolk
1 teaspoon vanilla extract
140 grams all-purpose flour
120 grams cake flour
1/2 teaspoon baking powder
1/2 teaspoon salt
Lemon Curd
500 grams FRESH lemon juice
114 grams unsalted butter
60 grams heavy cream
8 eggs
400 grams granulated sugar
1 teaspoon salt
1 teaspoon vanilla extract
Shortbread:
1. Using a stand mixer fitted with the paddle atachment cream together the butter, granulated sugar, and confectioners' sugar on medium speed for about 5 minutes, or until light and fluffy. If you are using pure arm strength to do this, it will take about 10 minutes. Stop the mixer a few times and use a rubber spatula to scrape the sides and bottom of the bowl and the paddle to release any clinging butter or sugar. Beat in the egg yolk and vanilla on medium speed for about 2-3 minutes, or until thougroughly combined. Scrape the bowl and paddle again with a rubber spatula to make sure the egg yolk is thourougly incoroprated.
2. In a medium bowl, sift together the all-purpose flour, cake flour, baking powder, and salt. On low speed, slowly add the flour mixture to the butter-sugar mixture and then mix for about 15 seconds, or until the flour mixture is totally incorporated and the dough is evenly mixed. Stop the mixer and scrape the bowl again to make sure all of the flour mixture is thouroufly incorporated.
3. Scrape the dough out onto a sheet of plastic wrap, and wrap the dough in the plastic wrap, pressing down to form a disk 6 to 7 inches in diameter and 1 inch thick. Refrigerate the dough for about 30 minutes, or until it has firmed up but is still somewhat pliable.
Lemon Curd:
1. In a medium nonreactive saucepan, combine the lemon juice, butter, and cream. Place over medium-high heat and heat to jut below a boil. Meanwhile, in a medium heat-proof bowl, whisk together the eggs and egg yolks until blended, then slowly whisk in the granulated sugar until combined. Remove the lemon juice mixture from the heat and gradually whisk a little bit of it into the sugar-egg mixture. Continue whisking the hot liquid into the eggs, a little at a time, until all of it has been incorporated.
2. When all of the lemon juice mixture has been incorporated, return the contents of the bowl to the saucepan, and return the saucepan to medium heat. Cook, stirring continuously with a wooden spoon and making sure to scrape the bottom of the pan frequently to prevent the eggs from scrambling, for 5-8 minutes, or until the mixture thickens and coats the spoon thickly.
3. Remove the lemon curd from the heat and strain through a fine-mesh sieve into a medium bowl. Whisk in the salt and vanilla. Preheat the oven to 350 degrees F.
Assembly
1. Lightly flour the dough disk. Roll out the dough into a rectangle 9 by 11 inches and about 1/4 inch thick. Transfer the sheet of dough to a 9 by 11 inch greased and parchment paper'd baking pan or baking dish with at least 2-inch-high sides. Press the dough to fit the bottom of the pan. Bake for about 20 minutes, or until the shortbread is light brown- about the same color as maple wood. Remove from the oven, pour the lemon curd on top, and smooth the filling evenly over the shortbread with a rubber spatula.
2. Bake for another 15-20 minutes, or until the curd has set and jiggles like firm Jell-O. Let cool to room temperature in the pan on a wire rack, then refrigerate for at least 4 hours to allow the curd to set. Sprinkle generously with confectioners' sugar!
I am always taking pictures. And not all of them seemed to fit my most recent post, but I wanted to share all the same.
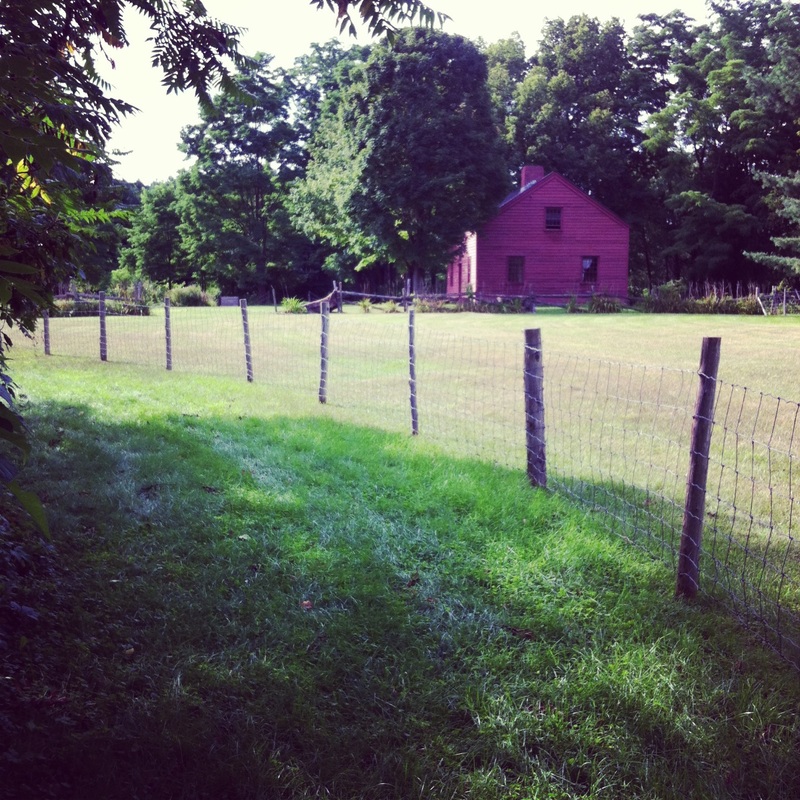
I started working this week! Getting back into the grove of kitchen life (or just work in general) has proved to be a bit of a struggle. I really started to love putzing around in my home kitchen, cooking and baking when I chose to, becoming inspired by what ingredient was featured in my latest issue of Bon Appatit. With that said, I really did enjoy my first week. Shelburne Farms is a 1,400-acre farm that is owned and operated by an educational nonprofit. The Inn (where I work) is located right on the shores of Lake Champlain, set back from the main road, it's beautiful. The restaurant at the Inn prides itself on being one of the premier farm-to-table establishments in Vermont. The menu is dictated by what is available in the market garden as well as what is available on neighboring farms. Additionally Shelburne Farms also produces Farmhouse Cheddar Cheese as well as raises lambs and pigs. It's an exciting place to work, as I love the challenge of finding uses for the variety of fruits, vegetables, and herbs that are available to us in the pastry kitchen. It's a wonderful feeling to be working amidst like-minded creative individuals, sharing not only life stories and experiences, but also taking the opportunity to learn from one another.
OK, my hokey kitchen rant is over. I promise this upcoming week I will snap more shots of what I'm whipping up....
I admit, that last paragraph was written last week. Monday evening of last week, my creative juices were running, I hemmed and hawed a little, but I managed to pump out the above paragraph. And then I most likely became distracted by something or someone... wandered away, telling myself I would return to write the last bit before the end of the week. Obviously that never happened. I feel as though I have somewhat of a valid excuse, work is kicking my behind (in the best way possible) and by the time I return home I either want to soak up the last bit of sunshine with an evening bike ride or hang with my gals.
I've done so much cooking and baking in the past week between home and work, the only way I am able to keep some sort of order is through my pictures. I get a bit overwhelmed with all the recipes I find that spark my interest, and just last week I started a list, a list that never really ends, but all the same a list of all the recipes I stumble upon and want to save for later making. I'm proud to say that I have tackled at least 5 thus far.
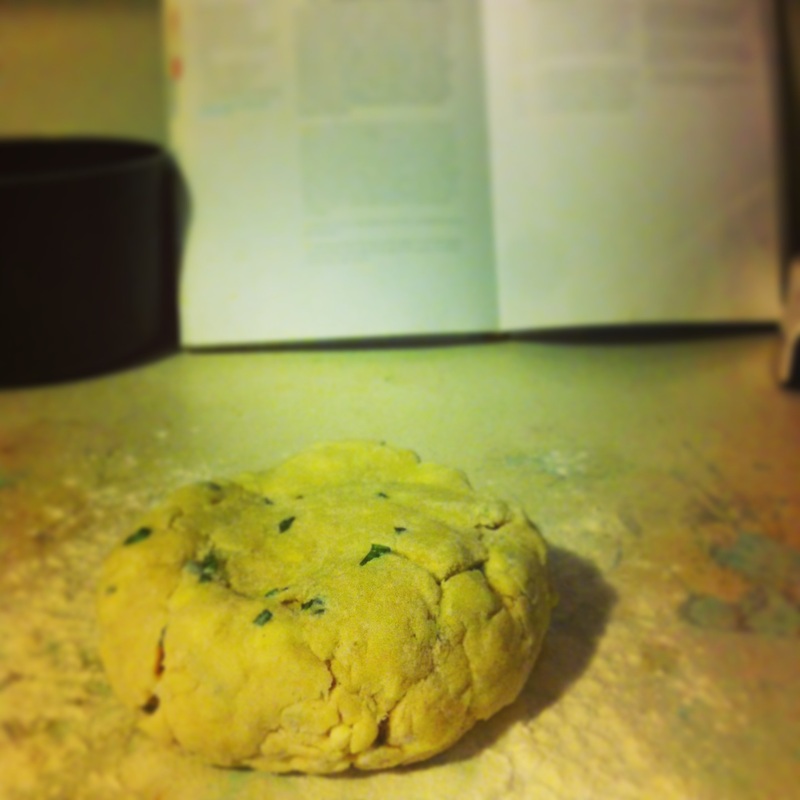
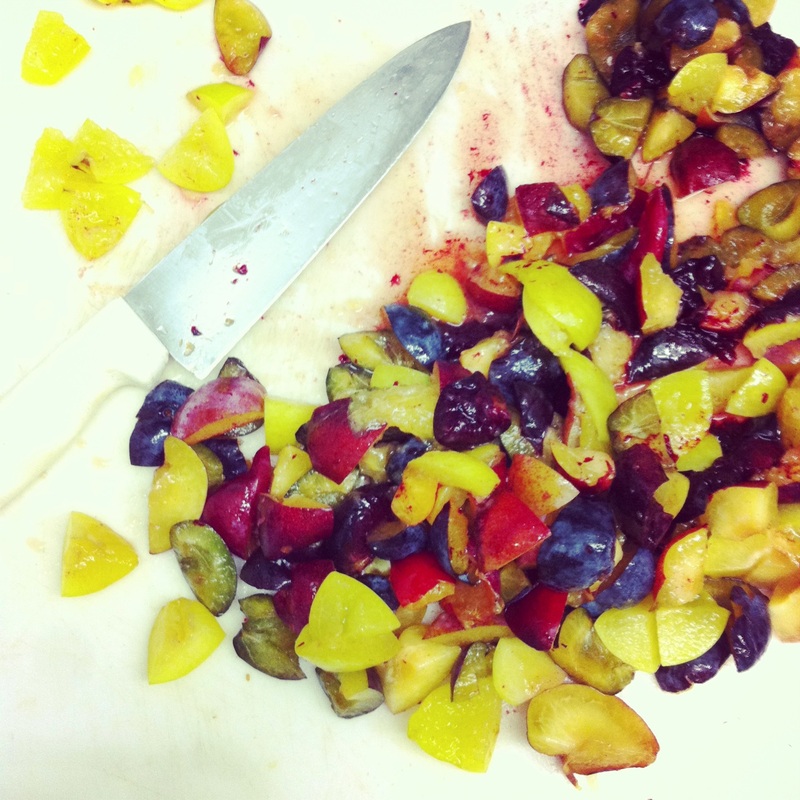
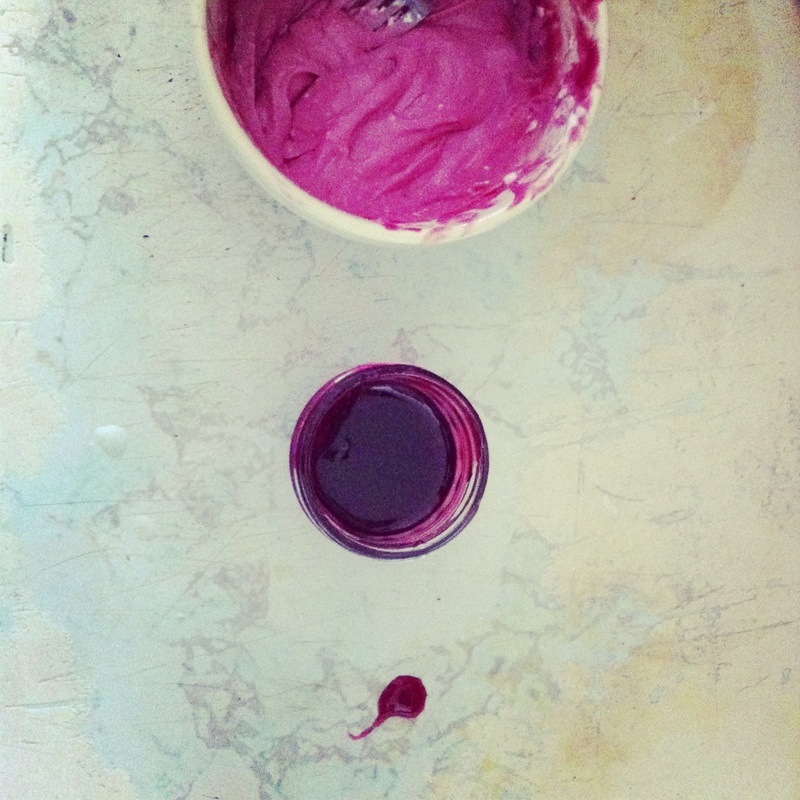
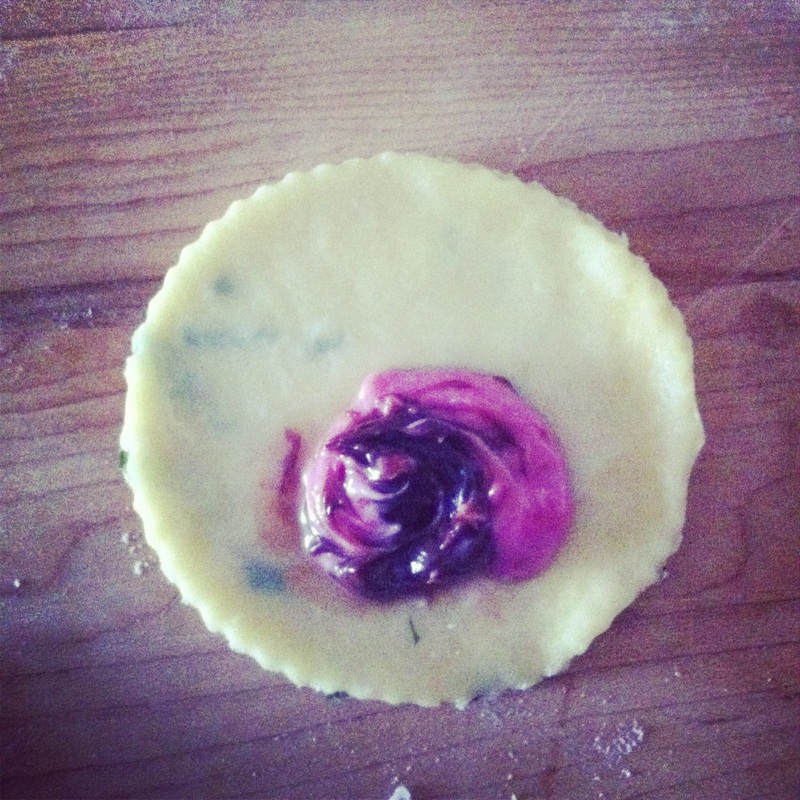
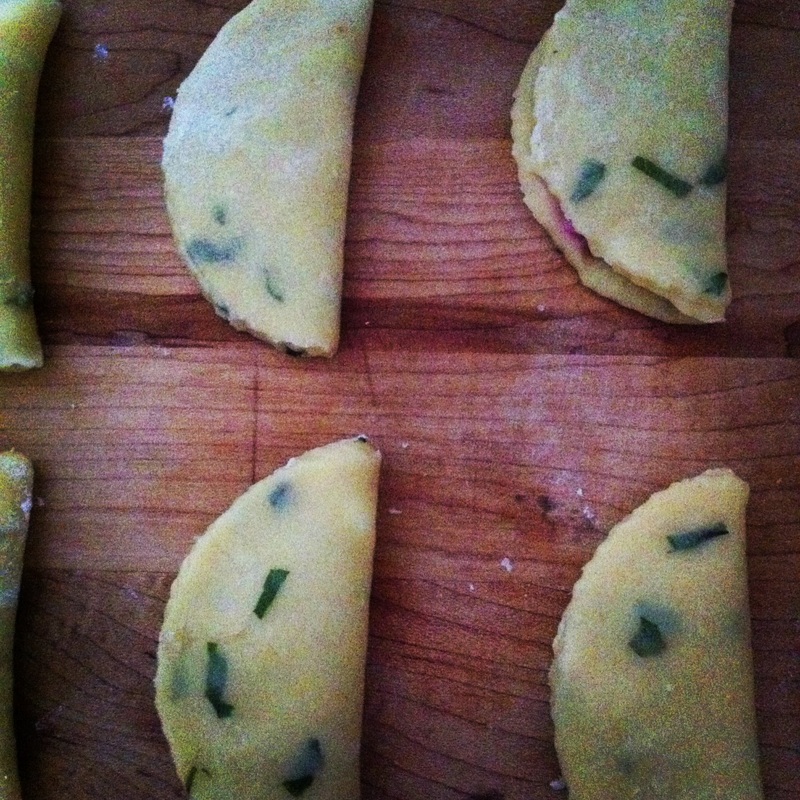
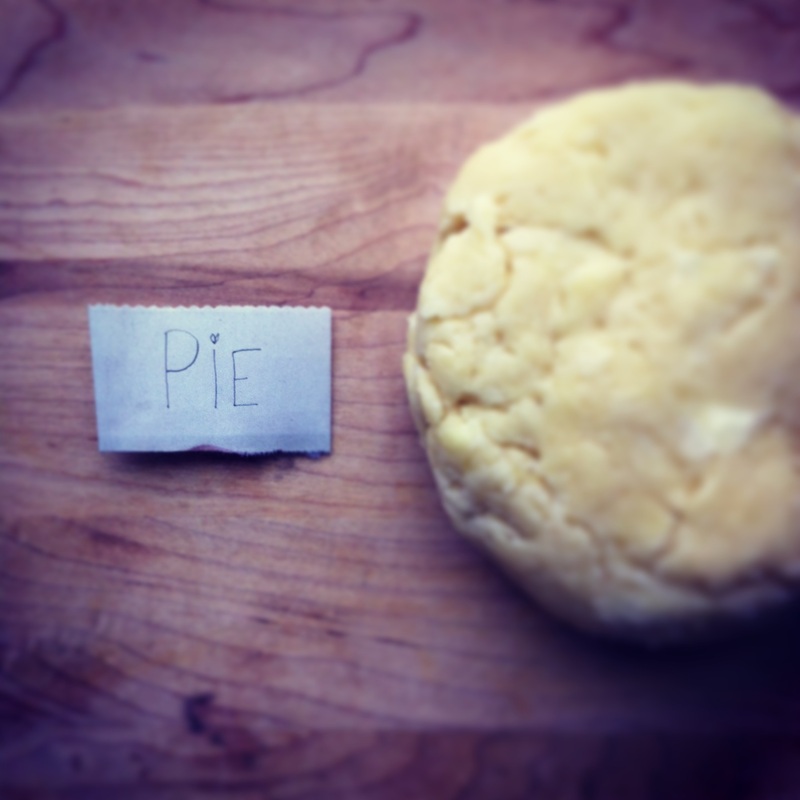
With Jamie gone during the week, I fall off the band wagon a bit in terms of making myself actual meals that go beyond blueberries, yogurt, and rice cakes. A quick blurb on Jamie, he's possibly the best person to cook for. He will eat almost anything, is endlessly encouraging, and seems to find equal excitement in the dishes I prepare. Thus is why, when he's been away this past month, I have started sending him and his work fellas treats. A tiny box that is stuffed with whatever I choose to whip up. I absolutely love sending things in the mail, decorating the package, sending sweet notes, oh man, it's the best. This past week I sent them blackberry filled hand pies. My dad had picked a mass amount of blackberries and left me with at least 10 cups. Eeek! What was I to do with all that fruit? Hand pies!
Patee Brisee
1 3/4 cups (245 grams) unbleached all-purpose flour
1 tablespoon sugar
1 teaspoon kosher salt
1 cup (2 sticks / 228 grams) cold unsalted butter, cut into 12 pieces
2 egg yolks
3 tablespoons cold milk
Using a stand mixer fitted with the paddle attachment (or a handheld mixer), mix together the flour, sugar, and salt for 10 to 15 seconds, or until combined. Scatter the butter over the top. Mix on low speed for 1 to 1 1/2 minutes, or just until the flour is no longer bright white and holds together when you clump it and lumps of butter the size of pecans are visible throughout.
In a small bowl, whisk together the egg yolks and milk until blended. Add to the flour mixture all at once. Mix on low speed for about 30 seconds, or until the dough just barely comes together. It will look really shaggy and more like a mess than a dough.
Dump the dough out onto an unfloured work surface, then gather it together into a tight mound. Using your palm and starting on one side of the mound, smear the dough bit by bit, starting at the top of the mound and then sliding your palm down the side and along the work surface (at Flour we call this “going down the mountain”), until most of the butter chunks are smeared into the dough and the dough comes together. Do this once or twice on each part of the dough, moving through the mound until the whole mess has been smeared into a cohesive dough with streaks of butter.
Gather up the dough, wrap tightly in plastic wrap, and press down to flatten into a disk about 1 inch thick. Refrigerate for at least 4 hours before using.
Quick Blackberry Jam Filling
1 quart fresh ripe blackberries, hulled
1/2 cup superfine sugar
2 tablespoons fresh lemon juice
Put the blackberries in a food processor and process until coarsely chopped. Transfer the mixture to a large skillet and stir in the sugar and lemon juice. Bring to a boil over medium-high heat, stirring occasionally, and cook until the jam is thickened about 10 minutes. Transfer to a bowl and let come to room temperature.
... To make the filling even more delicious, feel free to add a bit of whipped cream cheese to the jam. When I say whipped, I mean, throw it in your kitchen Aide if ya got one, or just give it a good stir to loosen it up, then add to jam.
Assembly
Preheat your oven to 350 degrees F. Divide your dough into two. On a lightly floured work surface, roll out your dough to 1/2"-1/4" thick. I like to use round fluted cookie cutters. I like my hand pies to be a bit rustic looking, so feel free to free form it. After cutting out the circles, I take about a 1/2 teaspoon of filling an plop it down a bit off center on the round. Using a pastry brush, I lightly brush the edges with water. I then fold the circle in half, making sure that the filling doesn't leak out. Using the tins of a fork dipped in flour, I seal the edges of the hand pie. Once all the pies have been filled, I like to freeze them for about 20 minutes (they retain their shape better this way). While the pies are freezing, make the egg wash. This will add shine to the final pastry! Yeah! To make the egg wash, blend 1 egg with 1 tablespoon of water. When the hand pies are ready, lightly brush with your egg wash and sprinkle with a little granulated sugar. They are now ready for the heat! Place in the oven for about 15 minutes. You want them to be lightly browned.
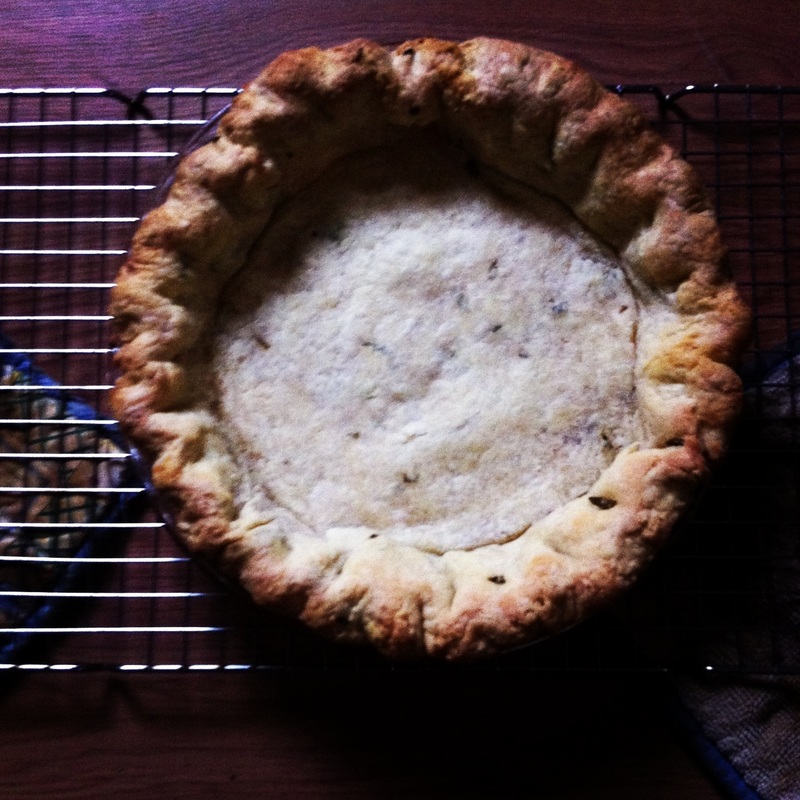
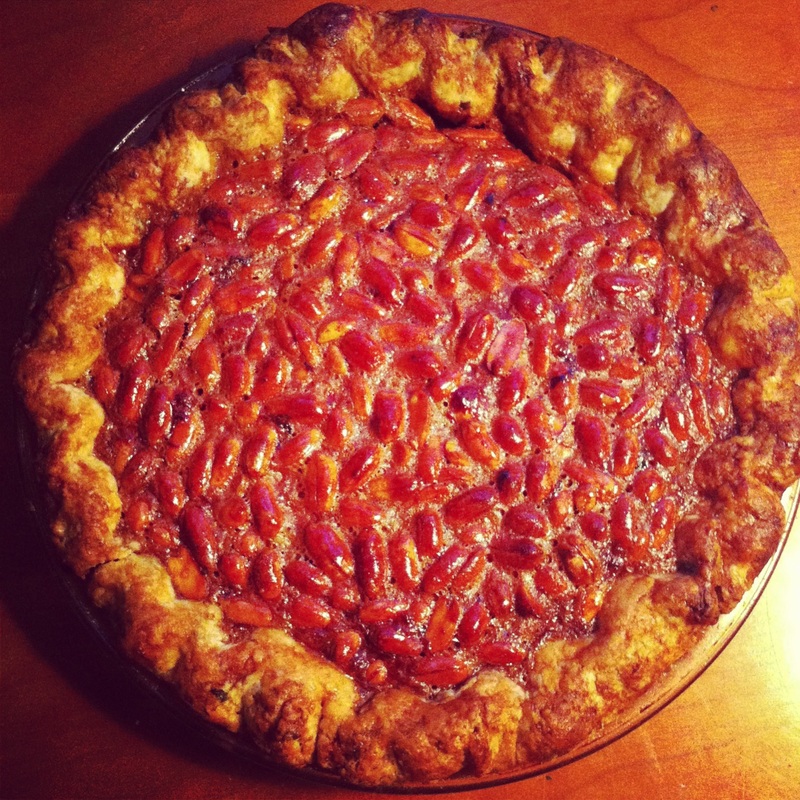
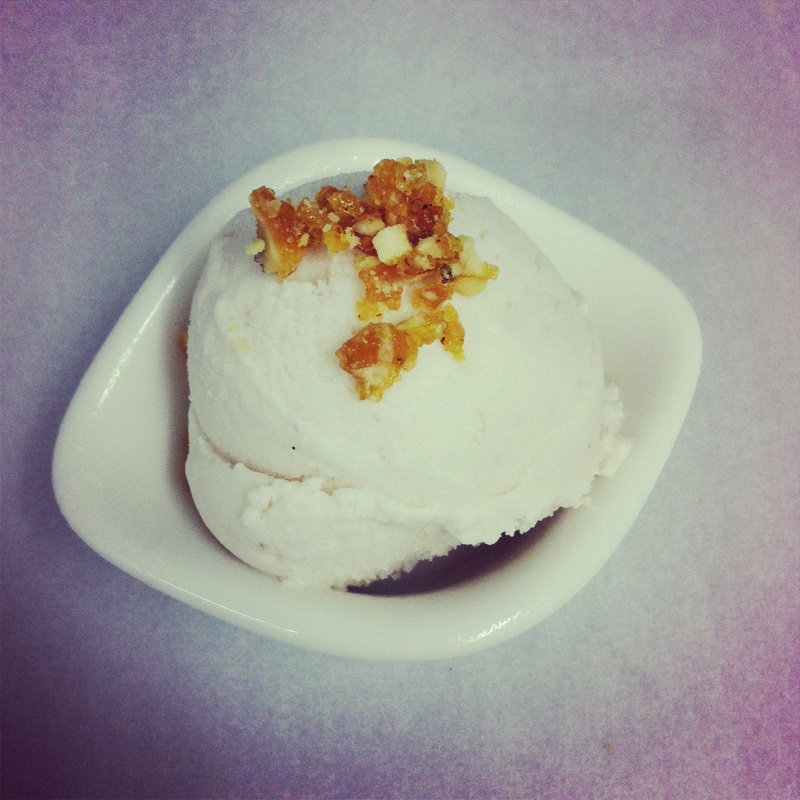
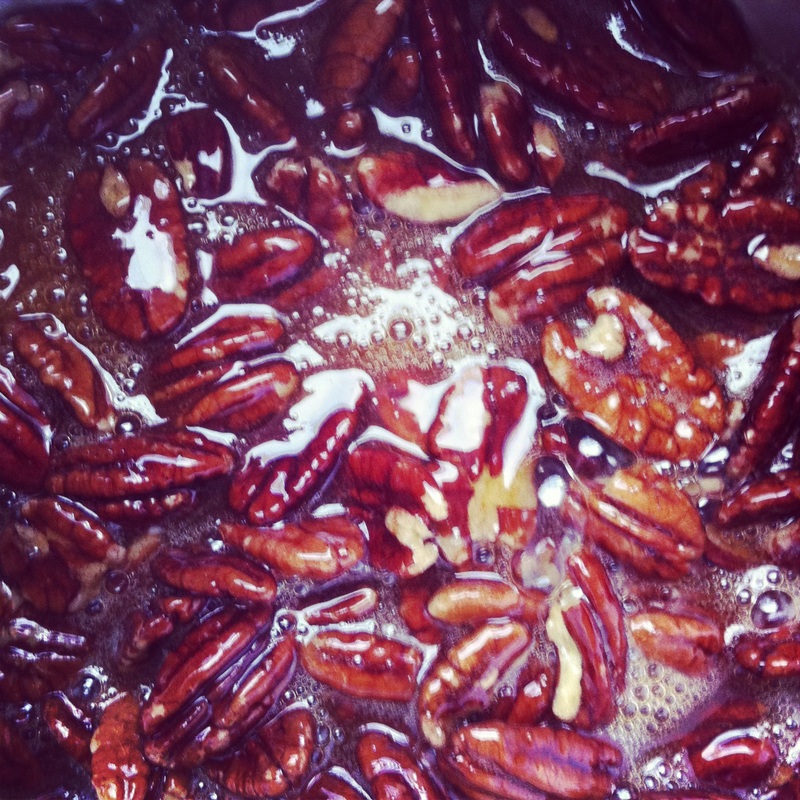
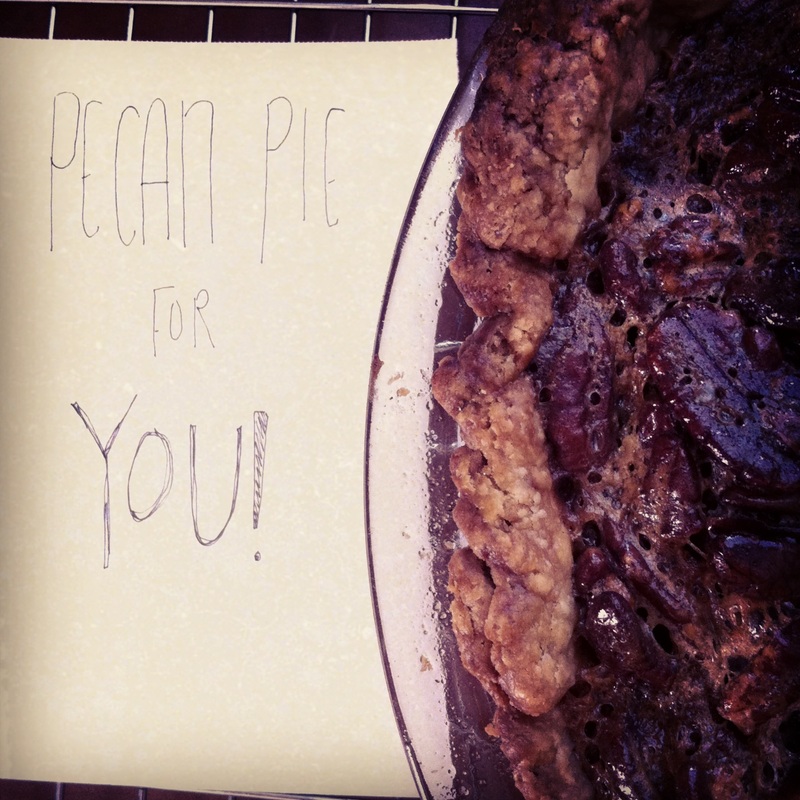
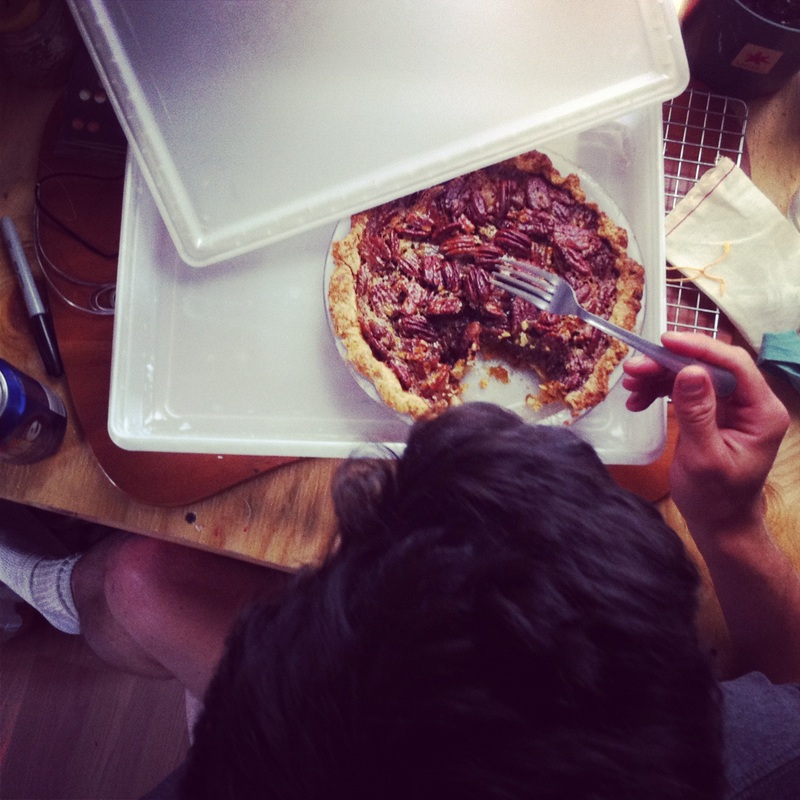
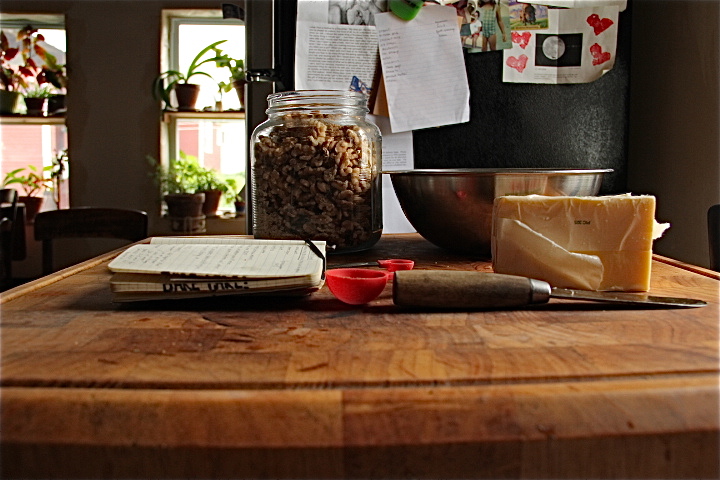
Updates! I was offered the job at The Inn at Shelburne Farms, and said yes on the spot! A seasonal position that will offer me the opportunity to persue what I truly love, but will allow me to leave come December when Jamie and I plan on taking off to Southeast Asia (more on that in the coming weeks). I conquered my exercise/yoga goals like a champ this week; made a point to go out biking every morning, and hit up some local yoga classes. My new glasses came in the mail, relief! No more headaches when I'm in bed reading cookbooks. And lastly, probably the most disheartening, I think I may be allergic to pecans, gah! I rarely/never spend the money on pecans when baking because they are just so damn expensive. But, I do love a good Pecan Pie, as does my significant other. I decided on Friday that I would surprise Jamie with his favorite pie, a welcome home baked good for him to savor all weekend. Fast forward a few hours, I've downed a bite or two of pie, my throat is feeling a bit scratchy. I ignore the obvious symptoms. Saturday evening comes along, Jamie's enjoying a bit of pie, I grab a fork and have a bite. Five minutes later my face is covered in hives and quickly spreading to my legs. This time, I'm a bit more responsive, maybe because I assume all nut allergies to be somewhat severe. My roommate Colin jumps up, runs about the apartment to try to locate Benadryl, comes back with Bengay. This story really doesn't have a dramatic ending, rather I realized I need to make an appointment to get this pecan thing checked out.
A few side pieces, I got to enjoy the lovely food at Duende twice this week. If you live in the area, do yourself a favor and go check it out, order the Poutine with butternut squash gravy. I tried my hand at Jim Lahey's Rye Bread, it was delicious and a perfect replacement for english muffins in the eggs benedict I made Jamie yesterday. Revolution Kitchen opens up this week, a new restaurant in Burlington offering all vegetarian and vegan fare, yes please! I also started a long long list of recipes I plan on tackling in the coming weeks; Sweet Corn Ice cream with Raspberry Sauce anyone?
I leave you with the best Pecan Pie recipe. It has a bit more pecans than in your traditional pie, but I know you'll love it all the same.
Flour Bakery's Pecan Pie
Pate Brisee ----> Pie dough
140 grams all purpose flour
2 teaspoons sugar
1/2 teaspoon salt
128 grams cold unsalted butter cut into 8 pieces
1 egg yolk
2 tablespoons cold milk
1. Using a stand mixer fitted with the paddle attachment, mix together the flour, sugar, and salt. Scatter the butter over the top and mix on low speed for about 45 seconds, or until the flour is no longer bright white and holds together when you clump it and pecan-size lumps of butter are visible throughout.
2. In a small bowl, whisk together the egg yolk and milk until blended. Add to the flour-butter mixture all at once. Mix on low speed for about 30 seconds, or until the dough barely comes together. It will look really shaggy and more like a mess than a dough.
3. Dump the dough out onto an unfloured work surface and gather it together into a tight mound. Using your palm and starting on one side of the mound, smear the dough bit by bit, starting at the top of the mound and then sliding your palm down the side and along the work surface, until most of the butter chunks are smeared into the dough and the dough comes together. Do this once or twice on each part of the dough, moving through the mound until the whole mess has been smeared into a cohesive dough with streaks of butter.
3. Gather up the dough and wrap tightly in plastic wrap, and press down to flatten into a disk about 1 inch thick. Refrigerate for at least 4 hours before using.
Pecan Pie Filling
150 grams sugar
120 grams water
320 grams light corn syrup
30 grams unsalted butter
3 eggs
1 teaspoon fresh lemon juice
1 teaspoon vanilla extract
1/4 teaspoon salt
250 grams pecan halves
1. Remove the dough from the refrigerator. On a well-floured work surface, roll out the dough into a circle about 12 inches in diameter and 1/8 inch thick. Roll the circle around the pin and then unfurl it on top of a 9-inch glass pie dish. Press the dough gently into the bottom and sides of the pan. Evenly pleat the overhanging dough with your fingers to create a decorative edge. Refrigerate the pie shell for at least 30 minutes. Preheat oven to 350 degrees F.
2. Line the pie shell with parchment paper or aluminum foil- fill with pie weights or dried beans. Blind bake for about 30 minutes, or until the entire shell is light brown.
3. Meanwhile in a medium saucepan, combine the sugar and water and stir gently with a small rubber spatula until the sugar is dissolved. Be sure the sides of the pan do not have any sugar crystals on them; if the do, use a pastry brush dipped in water to wash down any clinging sugar. (This helps prevent crystallization of the sugar as you are caramelizing it.) Place over high heat and bring to a boil. Do not jostle the pan as it is coming to a boil, or the syrup may start to crystalize. Once the syrup starts to color to a pale brown, you can gently swirl the pan to even out the caramelization. It will take 3-4 minutes for the sugar to start caramelizing and another 30 seconds or so to even out.
4. Once the sugar is golden brown, turn down the heat to medium and carefully pour in the corn syrup. It will sputter a bit and get clumpy. Continue to whisk for 1 to 2 minutes, or until all of the clumps of sugar have melted. Remove from the heat and whisk in the butter until melted and combined.
5. In a medium heatproof bowl, whisk together the eggs, lemon juice, vanilla, and salt. Slowly pour the hot sugar mixture into the egg mixture, a little at a time, whisking constantly. When all of the sugar mixture has been incorporated, add the pecans and stir to coat well.
6. When the pie shell is ready, remove from the oven and leave the oven set at 350 degrees F. Remove the weights and parchment/aluminum foil, and pour the pecan mixture into the shell.
7. Bake for 35-40 minutes, or until the pecan mixture has puffed up and doesn't move when you jiggle the pan. Let cool completely on a wire rack.
I could start this post off by saying that I'm terribly sorry that I haven't posted in a bit, but I warned you ahead of time, commitments like these take a bit of time. I've spent the past week or so frolicking about, soaking up lots of sunshine and ocean air with Jamie and his family. Many of you are probably wondering how I have so much free time to dabble about, in short, I'm currently unemployed. This unemployment business is like an extended vacation for me. Until this morning, I have been waking up when I please, filling my days with whatever I choose (such activities generally stray from my "chore" list that I insist on writing at the beginning of each week.. go figure). I decided though that I needed some order, some sort of routine to keep me sane. I woke up this morning, a bit groggy, but determined to tackle the day... hmm, I should possibly word that differently, I fear it suggests that I participated in some extreme activity, or somehow checked off everything on that damn to-do list. No worries, I seem to have ignored almost every task I really do need to get done, and focused rather on the great weather we had today. These past few weeks I've been really wanting to exercise more, get back into my yoga routine, etc... I blame this partly on my instagram account as I am following this crazy in shape yogamonger who can contort her body into a bazillion different postures, and also I seem to have stumbled upon the facebook page of a workout studio (all the pictures they post are of toned individuals looking oh so happy). Whatever the reason may be, I got serious today about this goal. I went on a 13-mile bike ride this morning and recently got back from a community yoga class at a local studio. Feeling fresh and fine, I took it to a whole notha' level and bought myself an array of vegetables, fruits, and grains... a little bit of culinary inspiration! I failed to mention the two iced coffees I chugged today, but they seem like a minor speed bump amidst everything else I accomplished today.
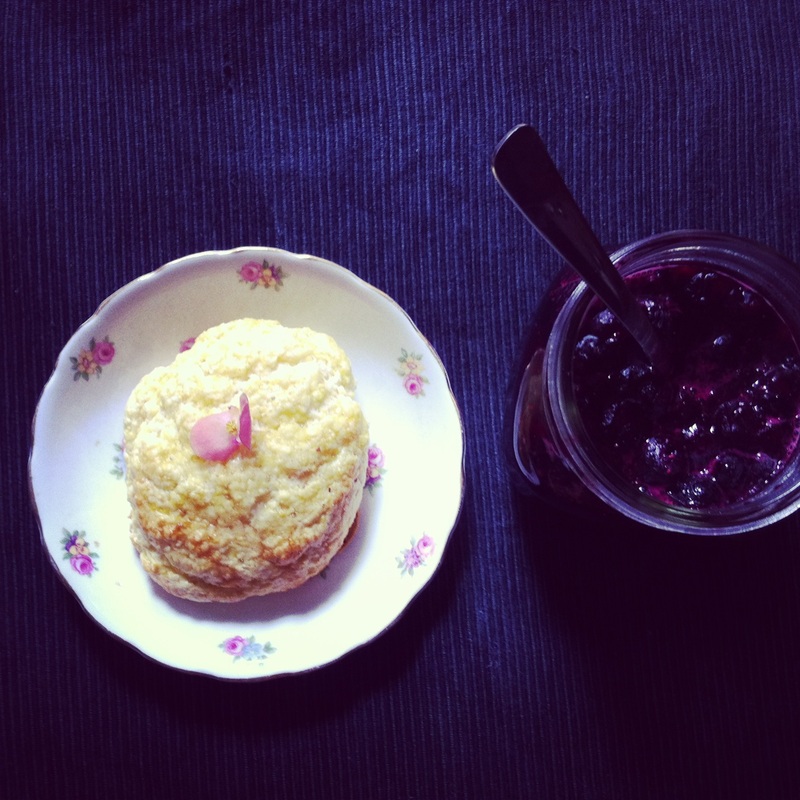
On a serious note, I have a lot to get done this week. Tomorrow I have an interview for an assistant pastry chef position, which means I really ought to tackle the pile of laundry that's slowly growing and spreading across my floor. I made plans to go pick blueberries with my dear madre, and hang with her for the evening... a welcome escape from Burlington. And let me not forget, prep and assemble a wedding cake for this Saturday. I'm a bit overwhelmed, a tad stressed, but all will be well.
So, rather then posting a new recipe, I leave you with this rambling piece. I promise to overwhelm you with pictures and recipes soon. And hopefully pictures of me in bad-ass yoga postures.
ox.
I took a hiatus from cooking and baking this past week. With Jamie working out of state, I lost all gumption to cook for myself. I've been surviving off of an array of vegetable kimchis, although delicious, my stomach is feeling a bit queasy as of late. My week instead has been filled with lady debauchery, gin and tonics, and river dippin'. Hard life. I've been procrastinating a bit in writing this post (go figure), but I refuse to let myself fall off the band wagon. So here she is.
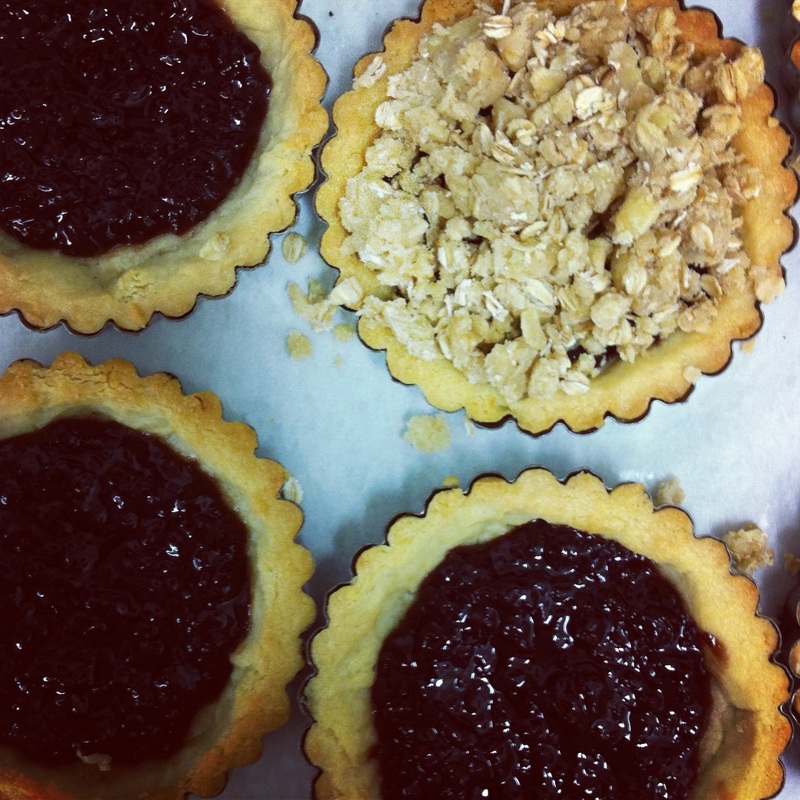
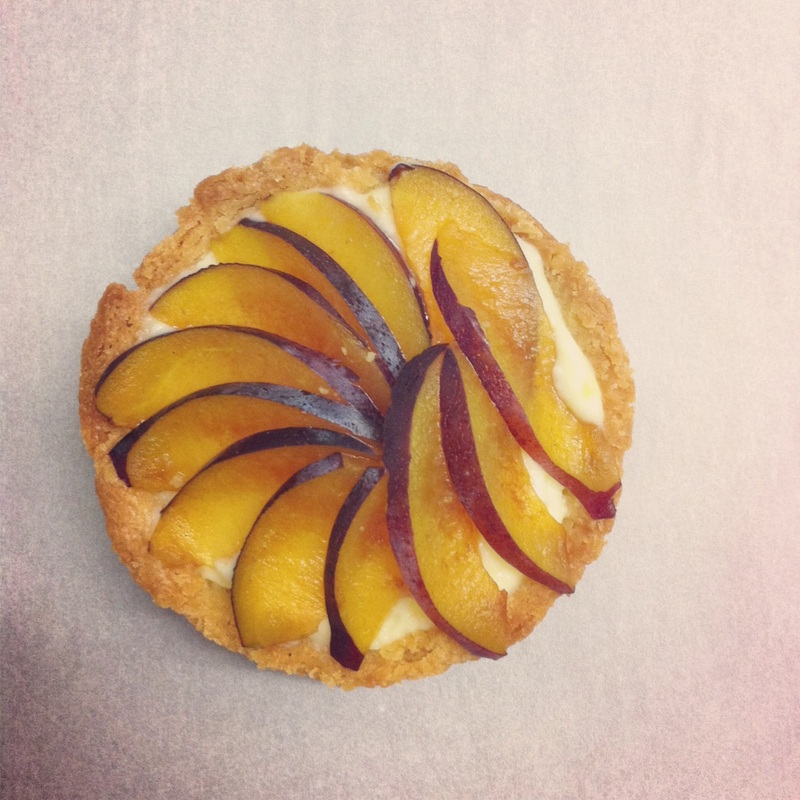
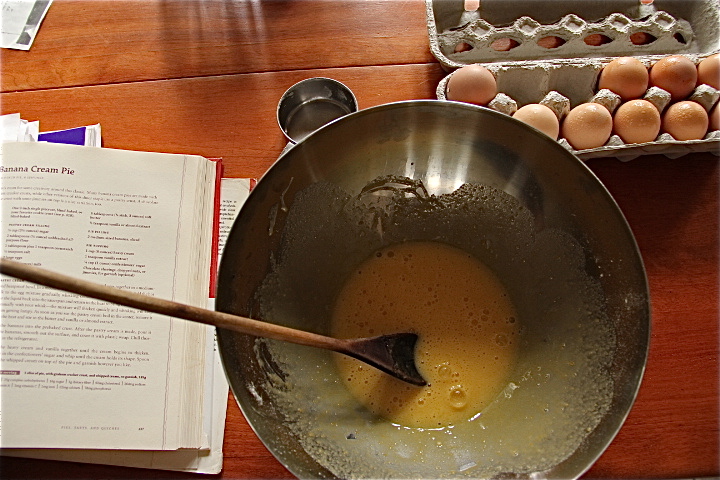
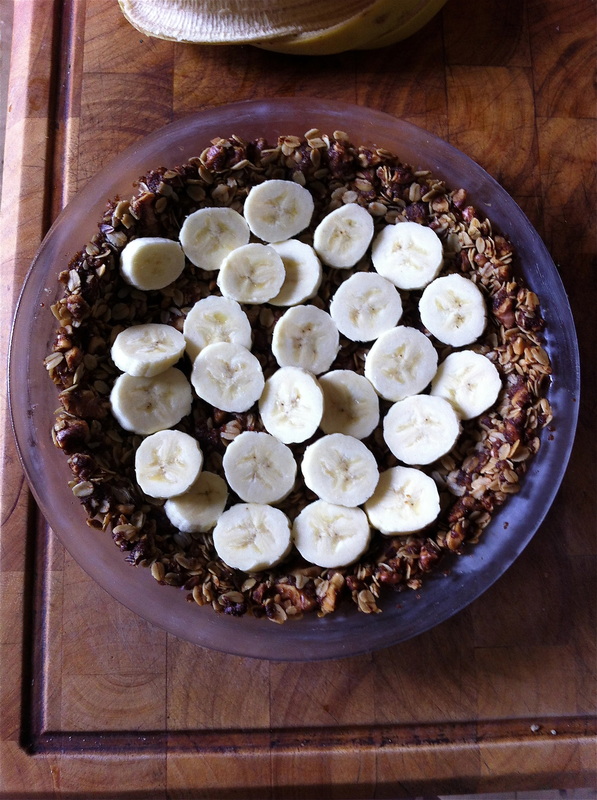
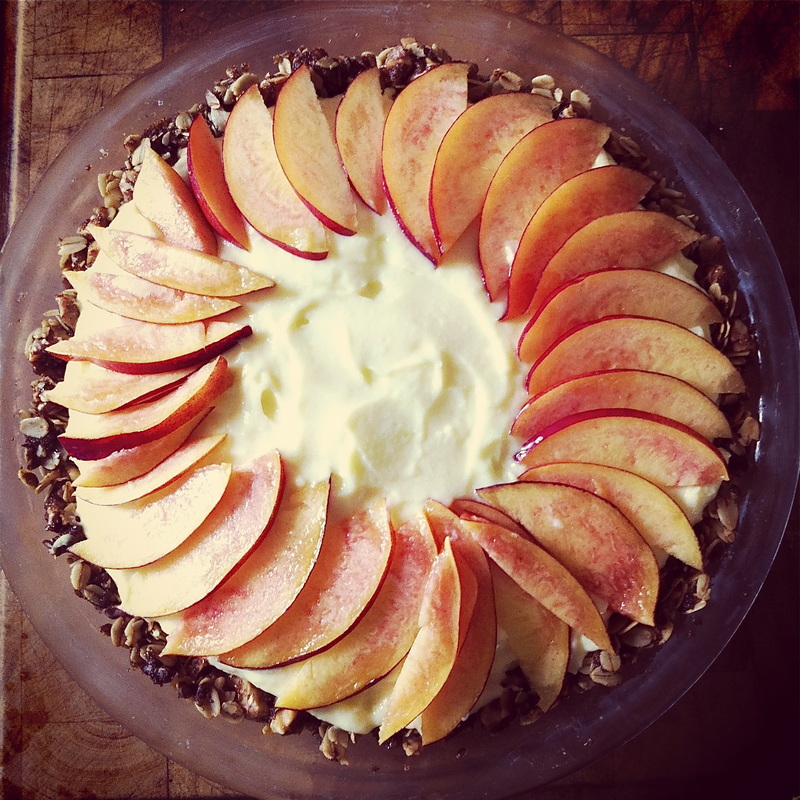
It's always nice for me to take mini breaks from the kitchen, sometimes I feel like this hobby of mine turns into a bit of a chore. So to say the least, I felt well rested and re-inspired by the time Saturday rolled around. I had a few a hours to kill this weekend, and decided to whip up a lovely tart. What started as a banana cream pie quickly turned into a banana and peaches cream tart. When I'm in the kitchen, my imagination is always running wild, I will often change ingredients, sub one out for another, even when I'm halfway through a recipe. It's a bit crazy, sometimes it fails miserably, and sometimes I hit the jackpot.
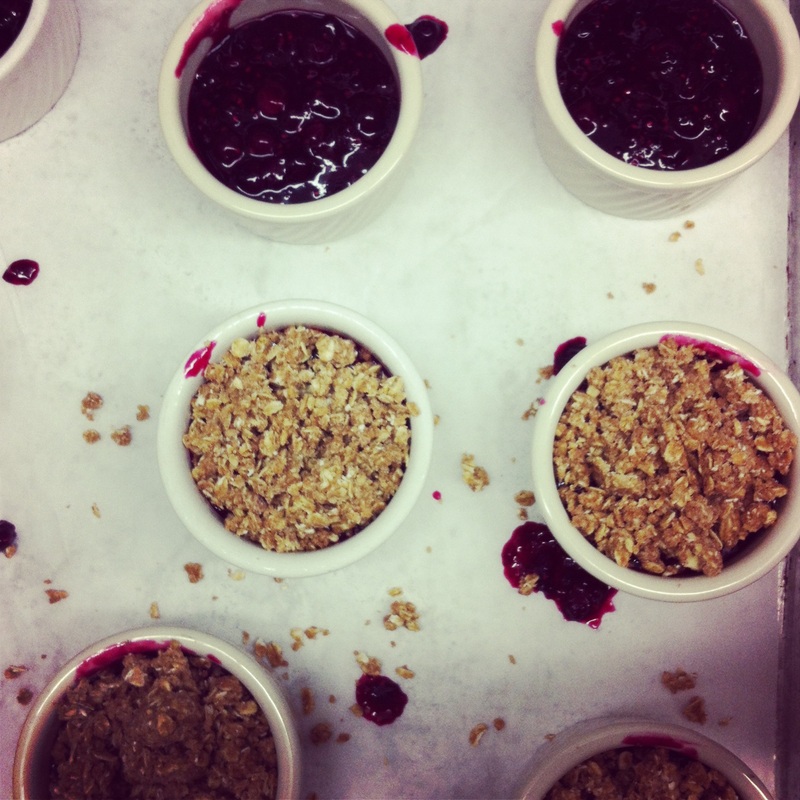
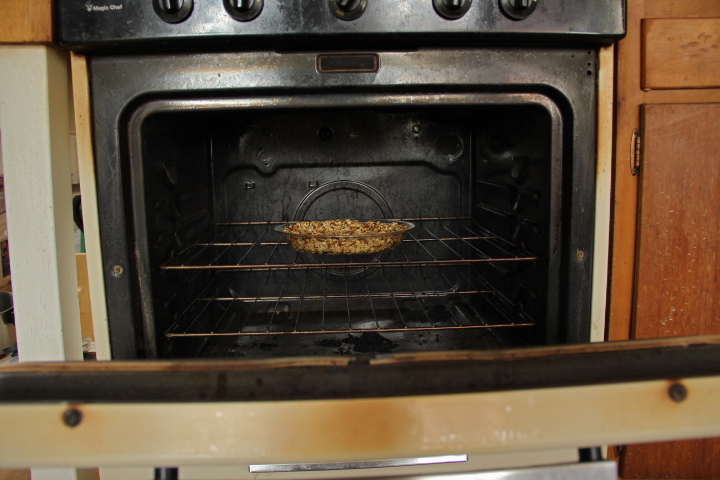
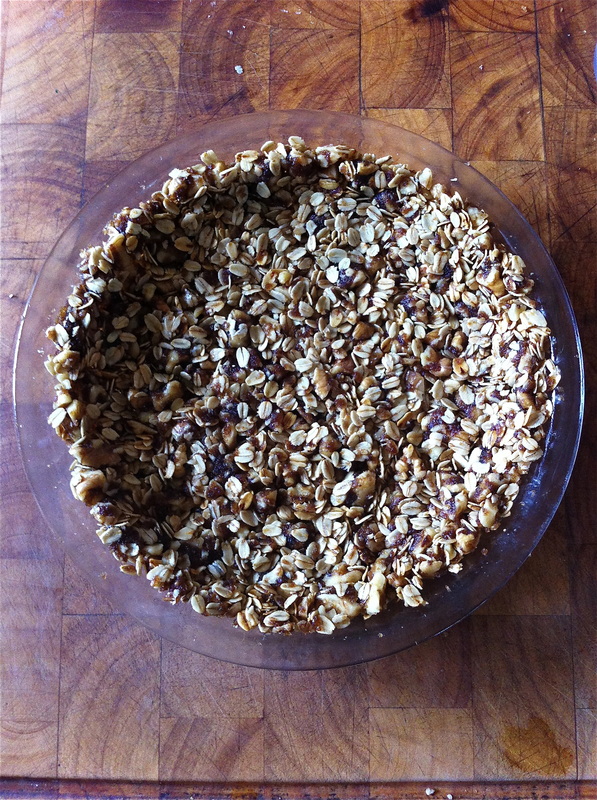
Soon after settling on a recipe, I decided I just didn't want to hassle with a traditional pie crust, and instead settled on a gluten-free oatmeal walnut pie crust. This crust takes no time at all to throw together and it's a great substitution for a graphm cracker crust (if you have some gluten-free folks in your circle).
Have a wonderful weekend, stay cool!
Gluten-Free Oatmeal Walnut Pie Crust
1 cup rolled oats
4 tablespoons brown sugar
1/4 teaspoon salt
1/2 teaspoon vanilla extract
1/3 cup melted unsalted butter
2/3 cup finely chopped walnuts
1, Preheat oven to 350 degrees F. Toast your oats in the oven for 10 minutes.
2. Combine the toasted oats with the remaining ingredients.
3. Press into a 9" pie plate. Bake for 15 minutes or until slightly browned.
Pastry Cream
I used this recipe. But I forgot to add the butter, it was just as wonderful without it! Assembly
Make sure that your crust and pastry cream have both cooled completely before you begin assembling.
Layer the bottom with sliced bananas. The pastry cream is next! Then arrange the peach slices on top!
|


 RSS Feed